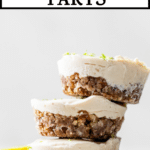
Vegan Key Lime Pie Tarts
This post may contain affiliate links. Please read our disclosure policy.
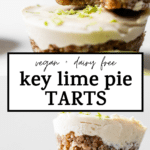
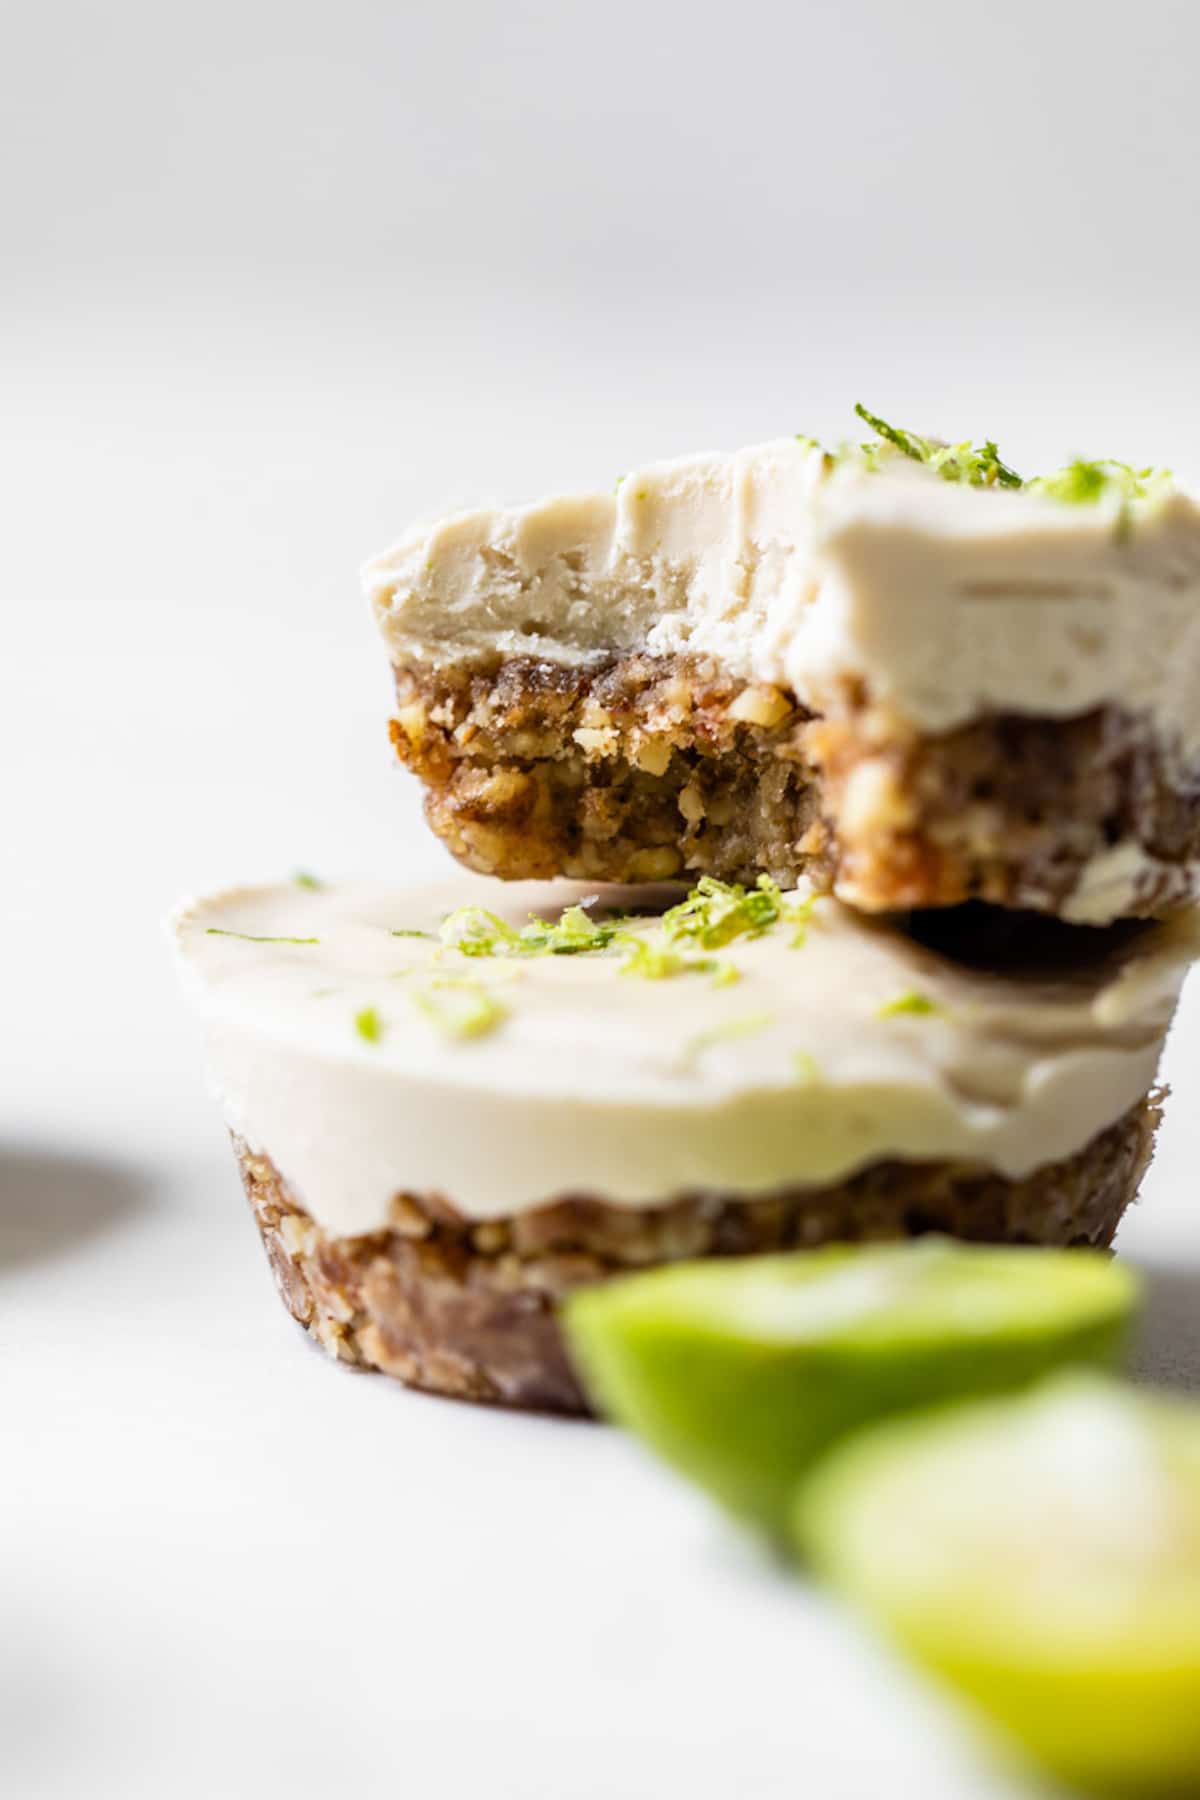
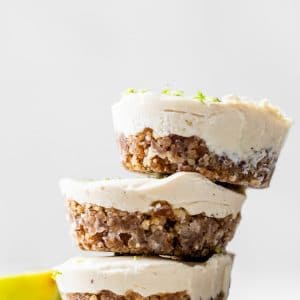
Easy Vegan Key Lime Pie Tarts are a delicious, bite-sized dessert that come together in about 40 minutes TOTAL. No baking is required, and they’re made with dates, cashews and maple syrup and taste like key lime pie!
Recipe features
- Similar to my no bake cheesecake, but with a hint of lime
- Delicious bite-size dessert recipe that tastes like key lime pie
- Raw, vegan and lightly sweetened with dates and maple syrup
Ingredient notes:
Dates – Deglet or medjool, and make sure they’re pitted
Cashews – Raw cashews, not salted and/or roasted
Nuts – I used a combination of walnuts and pecans, but almonds would work too if you’re looking for a substitution
Maple syrup – Can sub honey, though these won’t be vegan if you do, so just keep that in mind
Milk – ANY dairy-free milk
Step-by-step instructions
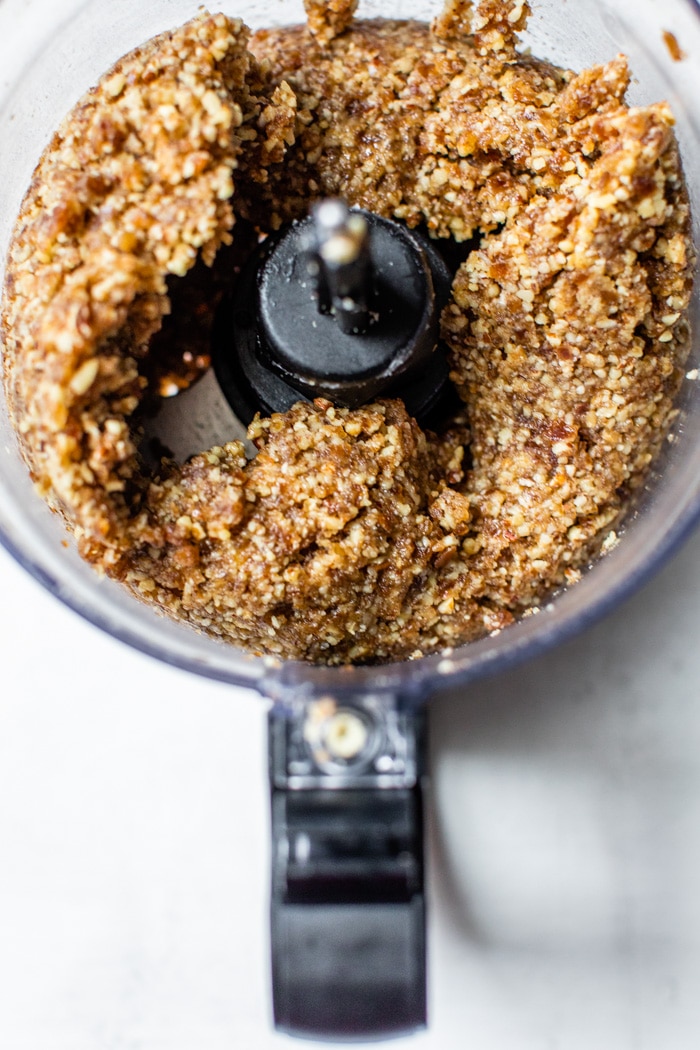
Step 1: Make the crust. Add the dates, walnuts, pecans, coconut oil, and syrup to a food processor and pulse until everything is combined. You may want to do this in two batches.
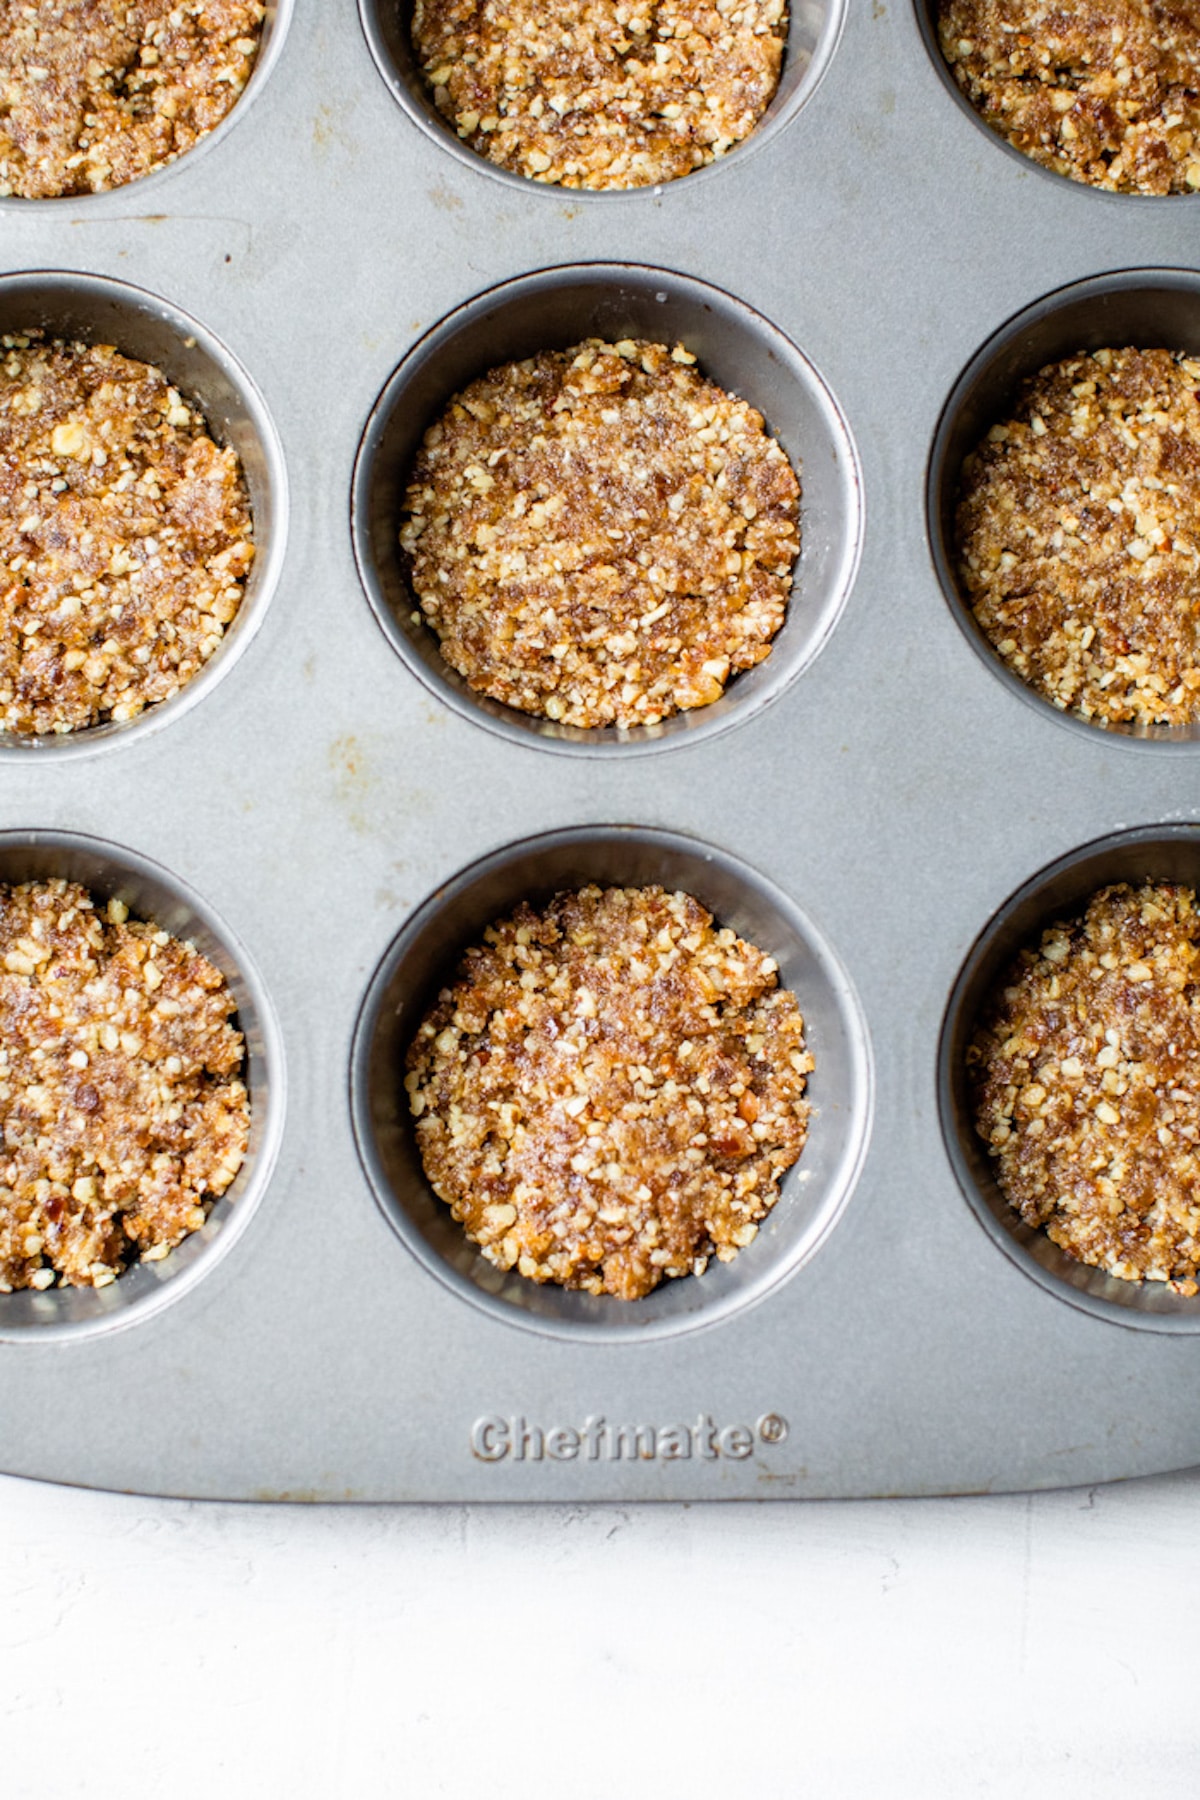
Step 2: Fill the muffin tin. Grease a 12-cup muffin tin with coconut oil or nonstick spray, then scoop the crust out of the food processor either with a spoon or your hands and press it down into the bottom. Place the entire muffin tin into the freezer while you make the filling.
Step 3: Make the filling. Add the soaked cashews, milk, coconut oil, maple syrup, and vanilla to a blender and pulse until the mixture is creamy. This may take a minute or so, so be patient. If it doesn’t seem to be blending, add more milk through the top of the blender 1 tbsp at a time, but be careful not to add too much or the filling will be too thin.
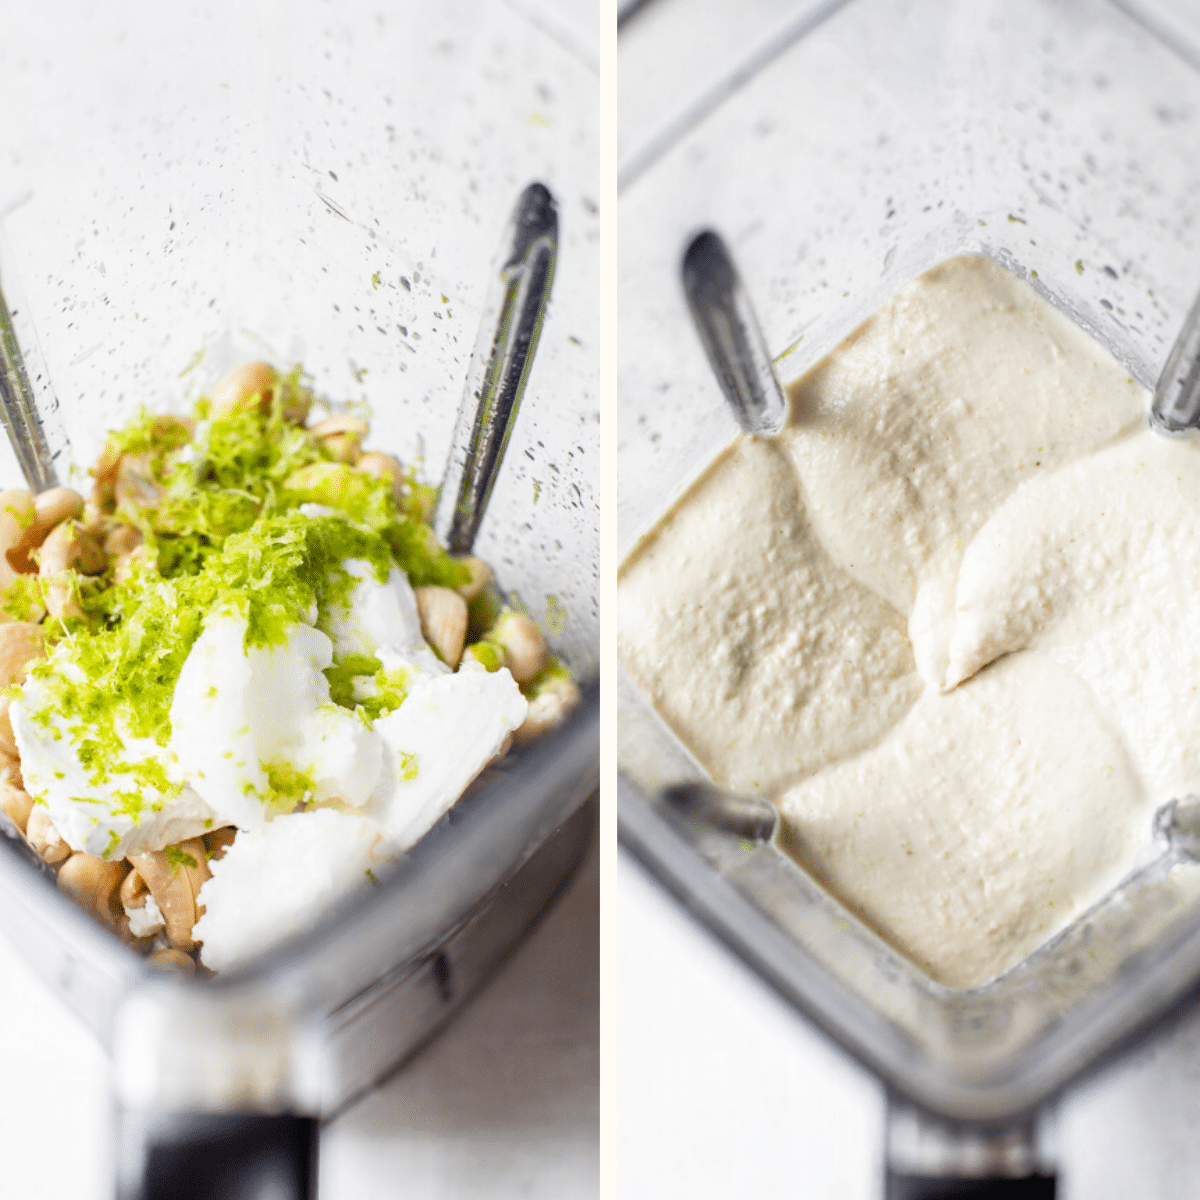
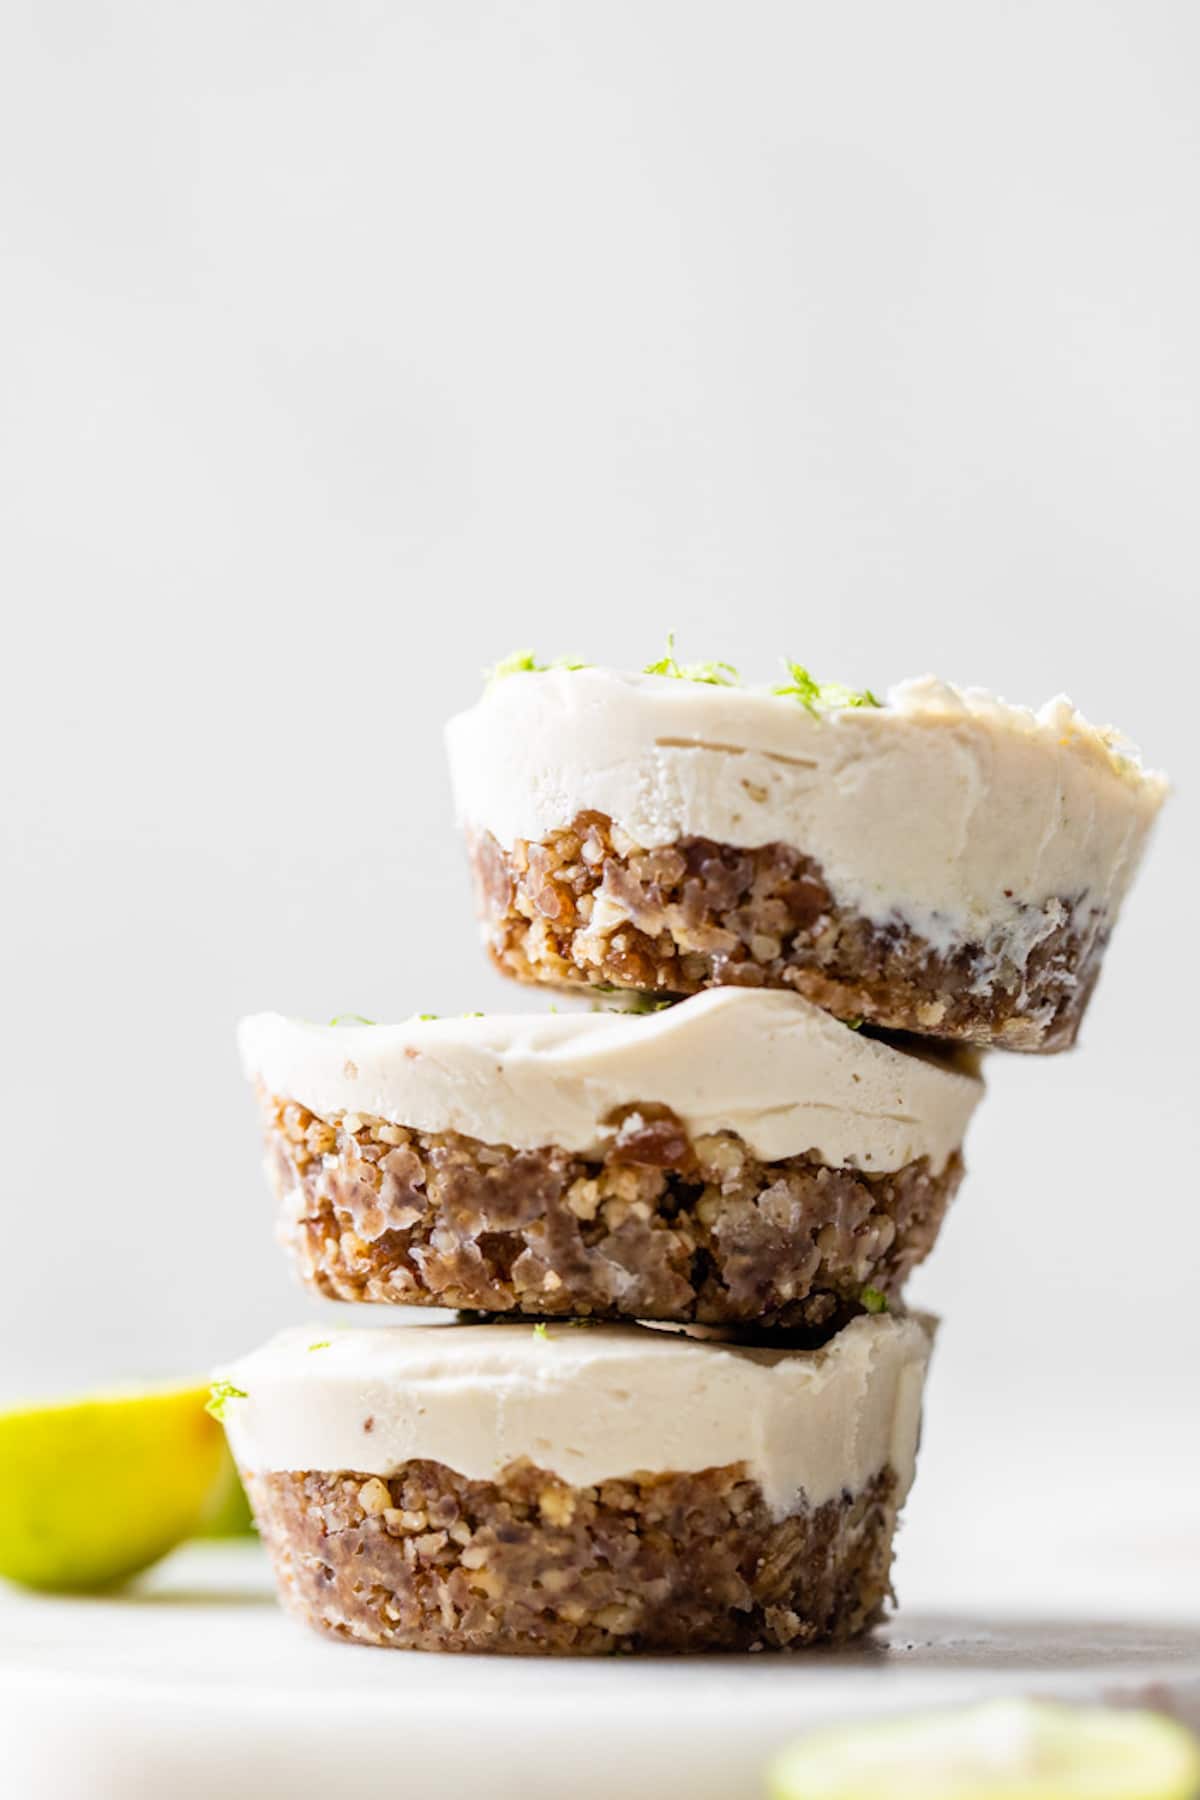
Step 4: Pour the cashew cream on top. Remove the muffin tin from the freezer and distribute the blended cashew cream on top of each tart crust. Sprinkle lime zest on top, then place the tin back into the freezer for at least 20 minutes, but preferably longer.
Before serving, run a knife along the edge of each tart, then carefully remove them.

FAQs and Tips
- Make sure to soak the cashews ahead of time; otherwise, they won’t be soft enough to create a creamy filling. If you’re in a pinch, you can add the cashews to a saucepan and boil them for 20 minutes instead.
- Storage: In my opinion, these are best stored in the freezer so they can hold shape. Simply remove them 5-10 minutes before you want to enjoy so they thaw out a bit.
How long will these last?
Awhile! Since these tarts are raw AND since they’re stored in the freezer, they’ll stay fresh for much longer than other desserts. With that said, I’d try to consume them within 30 days so they taste fresh.
More vegan desserts
If you made this recipe, be sure to leave a comment and star rating below. Thanks!
Vegan Key Lime Pie Tarts
Ingredients
for the crust:
- 1 1/2 cup pitted dates
- 1 cup walnuts
- 1/2 cup pecans
- 2 tbsp coconut oil
- 1 tbsp maple syrup
for the filling:
- 2 cups soaked cashews
- 1/2 cup dairy-free milk
- 2 tbsp coconut oil
- 2 tbsp maple syrup
- 1/2 tsp vanilla extract
- 1/4 cup lime juice
- 1 tbsp lime zest, or more
Instructions
- For the crust: combine dates, walnuts, pecans, oil, and syrup in a food processor and pulse until everything is mixed together. You may want to do this in 2 batches.
- Grease a muffin tin with coconut oil then evenly distribute the crust, using your hands or a spoon to smash it down flat; place tin in the freezer.
- For the filling: place cashews, milk, oil, syrup, extract, and lime juice in a high-power blender and pulse. If mixture seems to be stuck, add additional milk 1 tbsp at a time, but be careful not to add too much additional milk or the filling will be too thin.
- Pour cashew cream overtop of the 12 tart crusts, evenly distributing it.
- Sprinkle each tart with lime zest and place muffin tin back in the freezer for at least 20 minutes, allowing time for them to harden.
- Store tarts in the freezer and use a knife to remove tarts from muffin tin.
- Eat frozen OR leave out for 10 or so minutes, allowing time for them to thaw before eating.
- Enjoy!
Notes
Nutrition
UPDATE NOTE: This post was originally published in March 2016. It was updated with new text and photos in July 2020.


These look so delicious