Orange Scones
This post may contain affiliate links. Please read our disclosure policy.

Orange Scones are tender, flakey and oh-so-delicious! Made with both orange juice and orange zest, then drizzled with a simple glaze, they pair perfectly with a cup of coffee in the morning!

Orange scones don’t really sound like they’d be my “thing”, but they absolutely are my thing.
See, I enjoyed orange-flavored baked goods, like my orange cake, cranberry orange muffins and my orange hot chocolate, but these scones are the real deal! The texture is superb and they’re only lightly sweetened, plus they pair perfectly with this boozy hot chocolate (just saying!).
Recipe features
- Made with orange juice and orange zest, so you get plenty of orange flavor
- Moist, tender, fresh, and flakey all at the same time
- Drizzled with a simple orange glaze to increase the sweetness a bit
Scones Ingredients
Flour – All purpose flour is the way to go, or substitute gluten free 1:1 baking flour if you want to keep these gluten free.
Sugar – Cane sugar is best, but you can substitute coconut sugar if you want these to be less sweet tasting.
Orange – Freshly squeezed orange juice is best. You only need 1 orange, and the result is much better than using store-bought juice.
Egg – I haven’t tested this recipe without egg, but you may be able to get away with using a flax egg (let me know if you try it this way!).
Milk – Any kind will work (I used oat milk).
How to Make Orange Scones
Step 1: Combine ingredients. In a medium bowl, stir the flour, sugar, baking powder, salt and orange zest together. In a separate large bowl, whisk the egg, orange juice, milk, and vanilla extract together. Then, pour the dry ingredients into the wet and stir to combine.
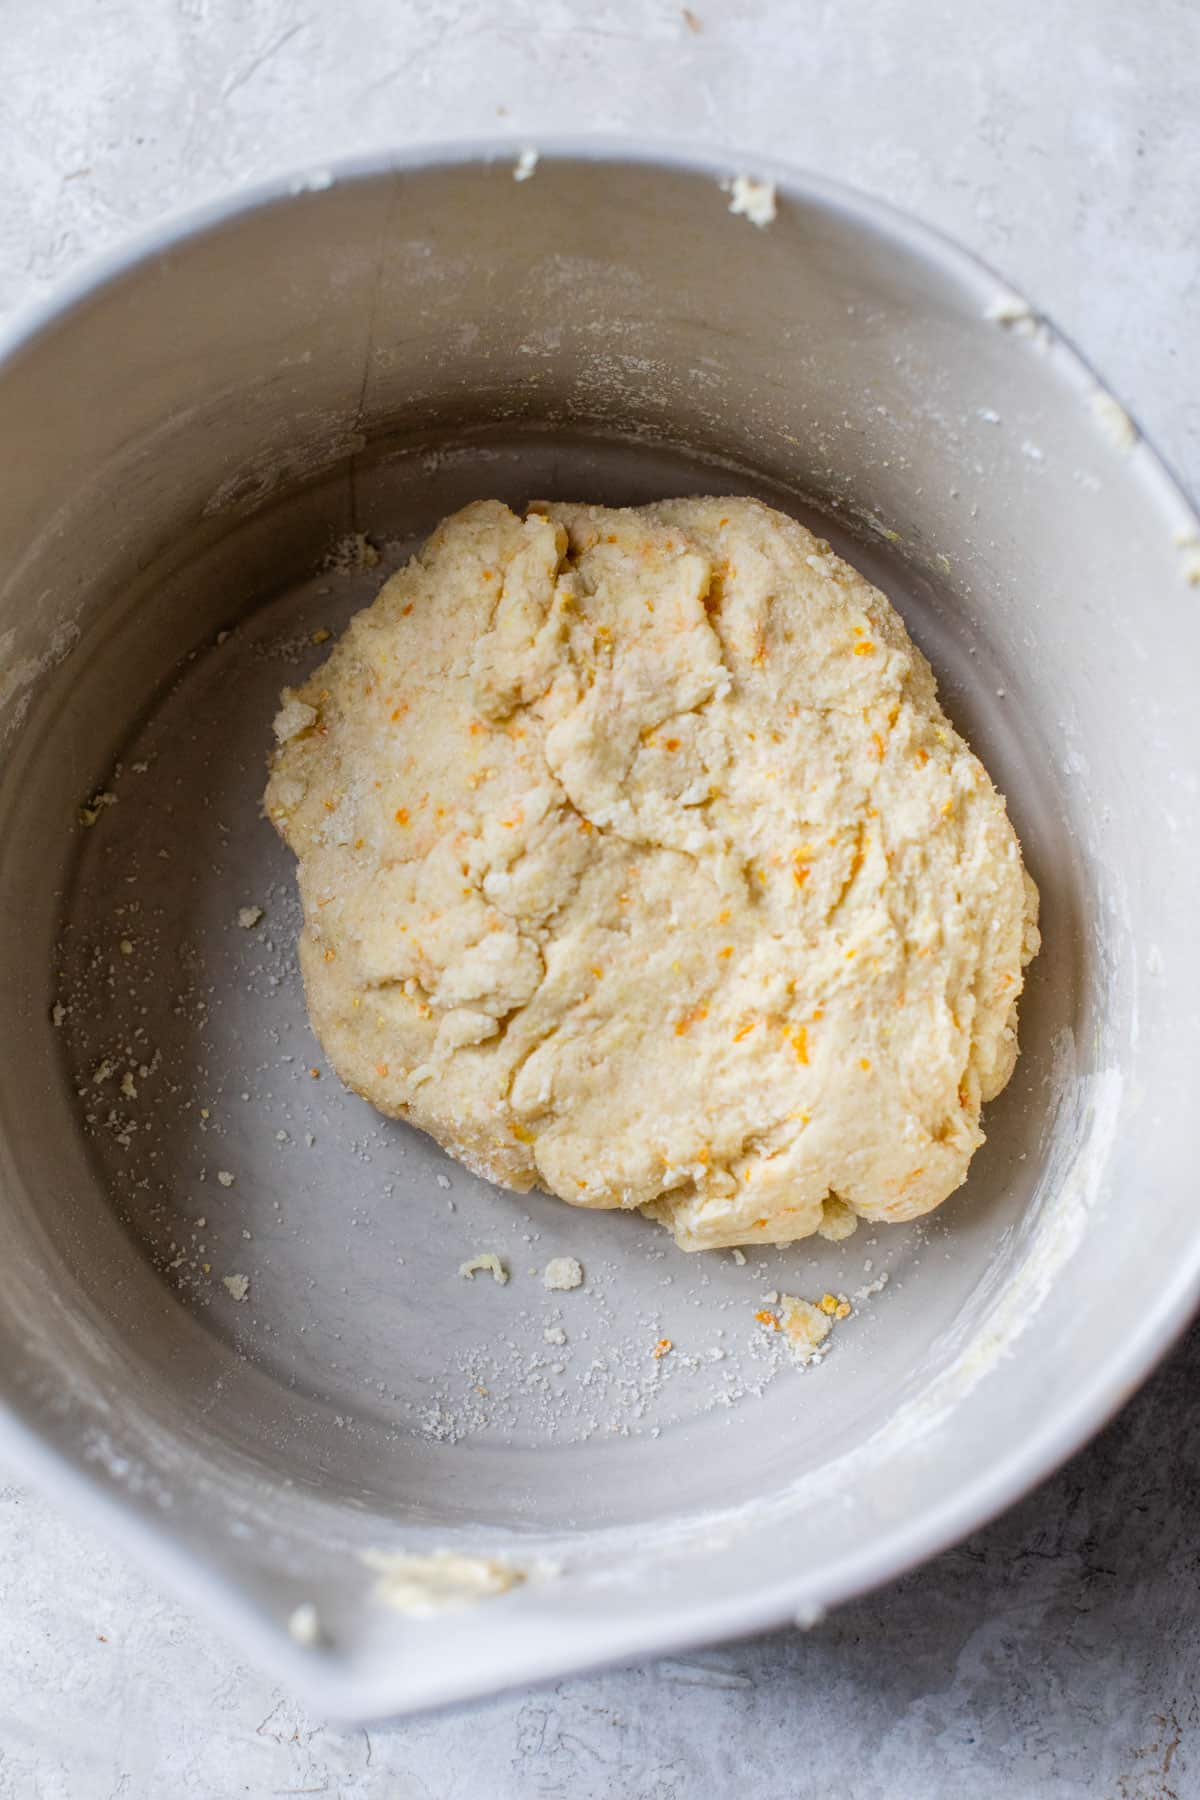
Step 2: Form the scones. Flour your hands (the dough will be sticky!), then form the dough into a ball and transfer it to a parchment paper-lined baking sheet or a silpat mat. Press the ball down and form a disc about 1/2 inch thick and 7-8 inches wide. Use a sharp knife to make 6 cuts into the dough, forming the scones, then separate them slightly from one another.
Optional: brush each scone with a bit of melted butter, then sprinkle with a little sugar.

Step 3: Bake. Place the scones in the oven and bake them at 350° for about 20 minutes. Leave them on the baking sheet for a few minutes before carefully transferring to a wire rack to cool.
Step 4: Add the orange glaze. Whisk milk, orange zest and powdered sugar together until you have a smooth consistency, then drizzle it over the scones.
Erin’s tips and tricks
- The dough will be sticky, so be sure to flour your hands before handling it, and to place the dough on a floured surface before forming it into a ball/disc.
- If you want the glaze to solidify, you’ll need to wait for the scones to cool before adding it; otherwise, it’ll melt and spill right off of the scones.
- Add-ins: feel free to bulk up orange scones by stirring in some shredded coconut, dried cranberries or even some blueberries.
How do I get scones to rise?
They should rise naturally thanks to the full tablespoon of baking powder. However, you can also ensure they’ll be fluffy by not forming the scones to be too thin. Make sure they’re 1/2″ or even 3/4″ thick before baking them.
Are these orange scones healthy?
I mean, kind of! Most scone recipes contain both butter and sugar, but this recipe doesn’t have any butter in it and instead uses orange juice and milk. It does have some sugar though!
Storage
- Room temperature: Scones should stay fresh when stored in a container at room temperature for up to 3 days.
- Freezer: Alternatively, you can freeze them. Simply prep them as-is, then place the pre-cut scones in a container, separating them with parchment paper. You can bake them straight from frozen, just know you’ll need to bake them for a bit longer.

More tasty scone recipes


If you made this recipe, be sure to leave a comment and star rating below. Thanks!
Orange Scones

Ingredients
- 1/2 cup sugar
- 2 tbsp orange zest, zest from 1 orange
- 2 cups all purpose flour
- 1 tbsp baking powder
- 1/2 tsp salt
- 6 tbsp butter, cold
- 1 egg
- 1/2 cup milk
- 1 tsp vanilla extract
for the glaze:
- 1 tbsp milk
- 1 tbsp orange juice
- 1/2 cup powdered sugar
Instructions
- Preheat oven to 350° and line a baking sheet with parchment paper or a silpat mat.
- Add the sugar and orange zest to a large bowl, then use your fingers to press them together, which allows the orange flavor to really come through. Then, add the flour, baking powder, and salt to that same bowl and stir to combine.
- Cut the butter into small chunks (I like to use a box grater to do this) and place it into the bowl with the dry ingredients. Use your hands to mix together until the butter resembles small pebbles (this may take a minute or two).
- In a separate bowl, whisk the egg, milk and vanilla together. Then, pour the wet ingredients into the dry and use a rubber spatula to mix together. Toward the end, you may want to use your hands to finish mixing.
- Flour a flat surface, then transfer the dough to the surface and form it into a large ball. Press the ball down and form it into a disc that's about a 1/2" thick and 7-8" wide.
- Transfer the disc to your prepared baking sheet, then use a large knife to cut the dough into 6 scones, carefully separating them. Optional: brush each scone with a little melted butter, then sprinkle with a bit of sugar.
- Bake the scones for 20-22 minutes. Wait a few minutes before transferring them to a cooling rack. Wait for the scones to cool a bit before adding the glaze.
- For the glaze: whisk the milk, orange juice and powdered sugar together, adding more powdered sugar as needed. Drizzle over scones and enjoy!
Notes
Nutrition


Just read and re-read orange scone recipe. In the ingredients “ 6” of butter the instructions prior to recipe. Says no butter! I’m confused which is correct.
Apologies for the confusion! Follow what’s in the recipe card, so yes, there’s butter 🙂
The easiest recipe for scones the unit loved them. Made me feel awesome. Thanks for making this easy
I’m glad you found it easy!
So easy and delicious I followed receipt exactly n results was great … thank you